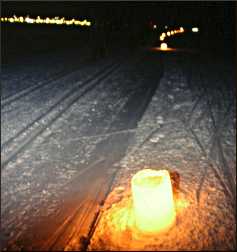
How to make ice luminaries
With homemade lanterns, line your path with glimmering lights.

© Beth Gauper
In winter, the best time to be out in the forest is during a candlelight ski in state parks and forests, when volunteers set out hundreds of luminaries along snow-draped trails.
It's always a magical occasion (for more, see Ski or snowshoe by candlelight ).
If you'd like to have the same effect all winter long, make some ice luminaries for your own walk. It'll impress visitors as well as put some sparkle into the long winter nights.
Or you can even make your own luminary-lined hike, ski or snowshoe event with friends (here's how Wisconsin's famous Book Across the Bay does it). For extra light, hold your event during a full moon.
For quick luminaries, just stick some candles or battery-powered LED lights into paper bags.
Or make real ice luminaries. Here's a recipe from the Wisconsin Department of Natural Resources.
If you don't have enough coffee cans or buckets, pick up some at a dollar store. That's also a good place to buy pillar-type candles that will last for a while.
Find a large bucket and a smaller bowl or container. Put some rocks in the bottom of the big bucket to make a shelf for the smaller bucket to sit on. Place more rocks into the smaller bucket.
Place the smaller bucket inside the bigger bucket. Pour water into the bigger bucket, around the smaller bucket.
Add food coloring, if you want. For a more festive look, add glitter, berries, orange slices or pine needles.
Place the buckets in the back yard. Wait for the water to freeze hard. Remove the rocks from the smaller container. Add some warm water to loosen the container. Remove it.
Turn the big bucket upside down in sink. Run warm water over it to remove the ice luminary. Be careful; if the water is too hot, the ice may crack.
Put a candle in the opening. Light the candle and place the luminary on the front walk or around the house.
When you're not using the ice luminary, put it in shade. With luck, it'll last through the winter.